Category Archives: Home & Garden

Opening a Swimming Pool

When it to opening your pool up for the summer it can be a daunting task when you remove the winter cover and reveal a horrible looking green liquid. Don’t fear opening your pool is a relatively simple task. Just follow the steps below:

Remove winter cover and install the summer one. If required net out as many leaves and debris as your can. Top up the water levels if required so that the level is halfway up the skimmer entrance..

1. Get the pump running and leave running 24 hours per day for the first week or so while carrying out the procedure below. Once the pump is running backwash your filter a couple of times.

2. Chemicals. At the heart of every well maintained swimming pool is a good chemical balance. Throughout the year you’ll need to add different chemicals to the pool in order to keep the balance right. One of the best free resources out there for calculating how much of each type of chemical you need to add to your pool is The Pool Calculator.

3. Cyanuric Acid

First of all Test Your Cyanuric Acid (CYA) levels. CYA is often referred to as Stabalizer or Conditioner. An ideal level to maintain is between 40-80. 100 is manageable however when you get up to 180ppm the effectiveness of any chlorine you add to your pool is taken away. If it is that high the only solution may be to drain a large % of the water from your pool and refill.

4. Adjust your pH level

Once your CYA level is in an acceptable range, adjust your pH so it is in the 7.4-7.6 range. If you pH is not at the correct level it can mean that any chlorine you add is not as effective as it would be, which may cause you problems as well as costing you to add more chlorine than necessary.

5. Shock the Pool

Next add a large shock of liquid chlorine and allow to circulate for 48 hours. After shocking the pool with liquid chlorine it is common for the water to a slightly milky colour. This is caused by the dead algae being suspended in the water. Don’t worry, with your pump on 24/7 you filter should clear up the water after a couple of days.

6. Kill the Algae

If the pool is still green add 2 x large bottles of algecide and allow circulate for 3-4 days.
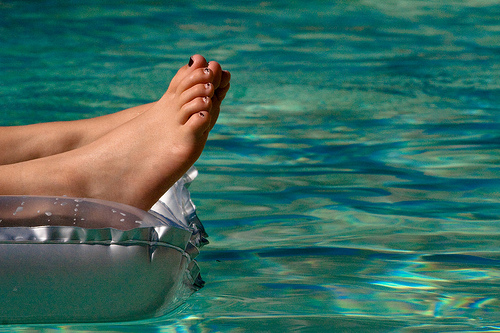
Opening your Swimming Pool

Opening your Swimming Pool

image by titlap

7. Brush it down. Once the pool water is reasonably clear thoroughly clean the water by brushing the walls and floor then vacuuming thoroughly.

8. Adjust the water level. Top up the level of the water to be covering the skimmer hole sufficiently.

9. Check Regularly. Test the water and adjust the chlorine and pH levels to properly balance the chemistry of your pool.


Tips to Opening a Green Pool

If you follow the above procedure opening your pool should be pretty straightforward. However if your swimming pool was green to start with the process may not be so straightforward.

If the pool water is green it means there is a lot more algae in the water than when it is clear. As stated above after shocking the green pool with chlorine it will most likely go a milky/green colour. This tells you that the algae has been killed. If there is lots of dead algae suspended in your water your swimming pool filter may not be able to remove it all.

If the pool isn’t clearing after 36 hours try switching the pump off and allow the water to settle for a few hours. Then carefully vacuum any debris that settles on the bottom of the pool straight to waste (not through the filter). By doing this you should remove the majority of debris in the water enabling your filter to deal with the remainder. You may need to repeat this vacuum to waste procedure a few times.

Another thing to try at this stage is to add a water clarifier or flocculant to the water. Most pool chemical shops sell different versions of these. They work by sticking the very small debris particles together, enabling the pools filter to catch them more easily.
How to Close a Swimming Pool for Winter

Below are the basic steps you need to follow to winterize or close down your swimming pool. The process is very straightforward and shouldn’t require any specialist knowledge.

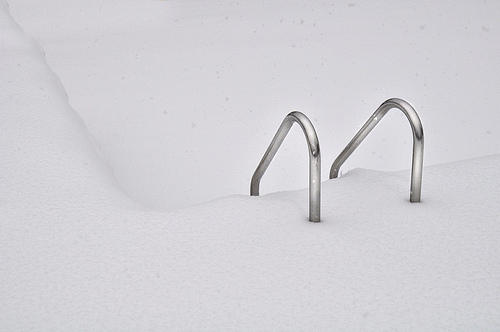
Winterize Your Swimming Pool

Winterize Your Swimming Pool

image by mknobil

1. Firstly ensure the chemical balance of your pool is correct. The two main things to worry about and adjust if required are the chlorine levels and the pH.

2. Ensure your pool is thoroughly cleaned. Take your time to clean it thouroughly brushing down the bottom and walls prior to vacuuming to ensure any algae build up is removed from the water. Complete the clean by backwashing the filter and cleaning all of the filter cages.
3. Add some winterizing chemicals to the pool. I like to use ‘Winterclear’, adding 1 litre of chemical for every 7,500 litres of pool water. After adding run the pump for 48 hours to fully circulate the chemicals.

4. Drain some water out of the pool so that the level drops 10cm below the bottom of the skimmer opening. The water level will naturally rise (via rainfall) over the winter.

5. Drain the skimmer pipe. To prevent any issues with ice add a sealed plastic bottle (with a few stones in it) into the skimmer.

6. Remove the summer cover and install the winter cover.

That’s it, your pool should now be ready to hibernate over the winter and should be in the best possible condition for when it is time to open your swimming pool in the Spring.

How To Remove Water Stains From Pine Table

I recently bought an antique pin kitchen table to sit in our new home. We got the table delivered and were extremely happy with it until after our first meal.

Several plates and cups that were slightly damp (not even really wet) had left large white ring marks where the table had absorbed the water.

Some details about the stained table…

  • Our table top is made from reclaimed pine floorboards
  • It has been recently fully sanded and waxed with Briwax

How to remove water ring marks

After much research and reading on the internet I performed a couple of small tests on the table before settling on a method to remove the white stains. The method below was used to successfully remove all of the water ring marks from the table. Best of all the whole table took under 5 minutes to do!

  1. Place a plain white cotton t-shirt over the affected area
  2. Pre heat a normal household iron to a low heat and ensuring the steaming function is switched off
  3. Place the iron on the t-shirt over the affected for 10-15 seconds then check to see if the mark is gone/reduced.

This worked superbly on our table, removing any trace of the many water marks we accumulated over the last 3 months. Here are some additional tips i’d offer:

  • Use an old t-shirt as some wax/stain is left on the shirt during this process
  • You may need to adjust the time the iron is used as it will be different for different bits or wood/irons
  • Best to start off with less time and build it up slowly as I guess it is possible to burn the pine if you are not careful

I intend to re-wax and polish the table several times over the next few months. I am hoping that the more layers of wax there are the more resistant to water stains the table will become.

Finally, don’t blame me if this doesn’t work or damages your table. I’ve read about others doing this with success and it worked 100% for me so if you have pine furniture with white water marks this may be worth trying.

Swimming Pool Maintenance

Looking after a swimming pool can be a daunting prospect if you have never done so. In this article we’ll break down the basic swimming pool chemistry you need to know about and try to teach you the basics maintenance that you’ll need to run on your in ground swimming pool.

Basic Pool Maintenance Tips

  • pH should be maintained between 7.2 and 7.6
  • Chlorine levels should be between 1-3 ppm, about 2.5 ppm is ideal
  • Run your pools pump for at least 8 hours per day
  • An ideal temperature for an outdoor pool is 78 degree Fahrenheit

Swimming Pool Maintenance

image by danks.de

Testing Your Swimming Pool

Ideally you should test your swimming pool everyday. As you learn how your pool reacts to both the water in your area, the weather and the amount of use your pool gets you may be able to get away with testing less frequently. Every swimming pool reacts differently so there are no set formula to any aspect of swimming pool chemistry.

When taking a sample of water always try to gather it from at least 30cm below the surface and away from the swimming pool wall.

Swimming pool test kits come in many shapes and sizes however as a minimum you should be testing the pH and chlorine levels on a regular basis. If you can maintain these two measures within the ranges stated above then you should have a relatively trouble free maintenance routine.

If you struggle to maintain one or both of these levels (pH & chlorine) or suffer other symptoms such as cloudy water you may need to take further tests or provide a water sample to a local pool specialist to diagnose the problem.

How to Add Chemicals To Your Pool

Be careful. The chemicals used in swimming pool maintenance can be dangerous if not handled correctly. By taking a few simple pieces of advice you can avoid any mishaps and will be able to enjoy your pool safely.

If you are planning on adding chlorine and acid to the pool never mix them together as this can be potentially explosive. While they can be added to the pool at the same time always mix them with water seperately (in different containers) and add them to different ends/side of the pool to prevent any nasty reactions.

The easiest way to add chemicals to your pool is by using an old watering can. Fill the watering can 3/4 full with water from the pool then add the required chemical (granules or liquid). Stir carefully (avoid splashing the water on your or your clothing) with a stick then walk around the pool pouring in the contents of the can. This will ensure the chemical dose is added in an even distribution.

After dosing your pool always leave the cover off and ensure the pump is running for at least 1 hour before anyone enters the pool. This will ensure there are no potentially harmful concentrations of chemicals in the water. Always retest the water before swimming in a recently shocked pool to ensure the chemical levels are safe for swimming (see the basic tips above). If at all possible leave 12 hours between shocking a pool and retesting and swimming.

Add The Right Amount of Chemicals To Your Pool

One thing I experienced when I first took over maintenance of a pool was getting the right measurements of chemicals to add. The dosage instructions instructions on pool chemicals (for granules anyway) usually require you to measure a particular weight of granules based on your pools capacity. It can be tricky to judge what 400 grams of acid granules looks like when pouring them from a 5kg container.

Swimming Pool Chemistryimage by Horia Varlan

To make measuring your chemicals easier, for each chemical i regularly use (acid granules, chlorine granules & alkaline granules) I have an old plastic cup that I have weighed when fully loaded  with chemical. Therefore I know 1 cup = 200gams of chlorine granules. There if i want to raise the chlorine level of my pool (11,000 m3) by 1ppm i’ll need to add about 90g of chlorine granules which is just under 1/2 cup.

Being able to add the exact amount of chemicals required will help you keep the pools chemistry exactly where you want it much more easily.

Swimming Pool Chlorine Levels

As mentioned above the ideal level of chlorine in a swimming pool is about 2.5ppm. If the pool falls below 1ppm bacteria can grow which can be potentially harmful and it is not wise to use the pool. When the chlorine levels read over 6 ppm you may experience problems with stinging eyes which can make your swimming experience unpleasant.

If your chlorine levels are too high then you’ll need to add some chlorine to the swimming pool. You can either add dissolved chlorine granules or liquid to increase the chloring levels. Also if you pool is in regular use you can keep a couple of chlorine tablets in the pools skimmer to help maintain the levels for longer.

Reducing The Chlorine Levels

Sometimes you may need to reduce the chlorine levels. On occasions you may get impatient and over shock the chlorine levels. One easy and effective way to reduce the chlorine levels in a pool is to run the hosepipe into the pool for a couple of hours. Also sunlight has the effect of killing chlorine so leaving the cover off on a sunny day will naturally reduce the chlorine levels of the water.

As a general rule if you add chlorine to a swimming pool the pH will rise. As a result it may be necessary to add acid to the pool first to reduce the pH level if you need to shock the chlorine levels.

Swimming Pool pH Levels

Again as we mentioned above the ideal pH for a swimming pool is pH7.2. This is the same pH that our eyes have is at this level. Every pool varies but you will probably find that over time your pH level will either drop or rise away from this neutral level. As the pH moves away from neutral the effectiveness of any chlorine you add can also be reduced making it crucial to maintain your pools pH at an acceptable level.

How to reduce a swimming pools pH

If your pools pH level is too high you can add some acid to reduce the pH. In an average swimming pool 400 grams of acid granules will reduce the pH by about 0.2. Of course different pools will react to different chemicals so always use the dosing levels on the instructions that come with the acid you

buy and work out the correct dose levels according to the exact capacity of your swimming pool. Likewise to increase the pH level you’ll need to add some alkaline granules.

Related Articles:

Backyard Composting Explained

Backyard composting is a great and simple way to recycle some if not all of your garden waste. All you’ll need to get started is a compost bin. Not only will you recycle your waste but you can also save money on compost by producing your own nutrient rich compost.

Positioning Your Compost Bin

Ideally your compost bin should be placed in a sunny spot on top of well drained soil. The heat from the sun will help to speed up the composting process that breaks down your organic waste while the soil base will help worms to gain access to the compost pile.

Backyard Composting

Backyard Composting

image by bunchofpants

You can place a compost bin on a concrete or paved surface however you should always add a layer of soil on the bottom first. When planting on top of soil it is a good idea to loosen the soil underneath with a fork. This will help encourage worms and useful bacteria to enter the bin.

Composting Tips

Perhaps the biggest factor of success when composting is to get a good mix of compostable materials. Ideally different types of materials should be added in thin layers of about 3-6″.

To help give your compost a boost you can buy pre bought compost starter. A much cheaper and readily available alternative is to add a little manure or even human urine to the heap to get the bacteria started!

Once your compost has started you should try and keep it moist, without being wet to help aid the bacteria. If the matter inside looks very dry add a bit of water.

Another essential composing tip for successful backyard composting is to turn your compost. Doing so ensure the matter gets broken down evenly and quickly. To do this simply take a garden fork and mix the compost inside the bin once per week.

What Can I Compost?

Vegetable & Fruit Peelings : These are excellent as they are high in both nitrogen and carbon

Tea leaves, coffee grounds & eggs shells: Again these work really well

Weeds: Most common garden weeds can be composted. For larger garden waste be sure to shred it to help speed up decomposition. Avoid certain weeds such as creeping buttercup and bindweed that will keep growing inside your bin!

Hair: Either human or pet hair can be composted!

Paper: Small amounts of paper or soft cardboard can be composted. Be sure to cut cardboard (such as egg boxes) into small pieces. Shredded paper also composts well, jsy try and avoid glossy paper such as magazines.

Grass Clippings: Grass clippings can be great for compost so long as you don’t add too much at once. As they are very high in nitrogen they can overwhelm a compost heap. A simple tip is to always try to add grass clippings at the same time as brown material such as leaves.

What Not To Compost

Meat: Do not try to compost any meat based products or scraps as this will do little apart from attract rodents.

Bread: or anything containing yeast

Cooked food: Anything that has been cooked.